Read the assembly from high to low
Start above the visible damage. Review roof runoff, gutter behavior, wall caps, joints, penetrations, window heads, trim, and where water exits. Gravity helps organize the review, but wind-driven rain and concealed paths can move water sideways. Photograph the full elevation so a mark beside a window is not evaluated without the roof edge or wall transition above it.
Separate sealant joints from flashing systems
Sealant can be appropriate at specific maintained joints, but it should not be described as a universal substitute for flashing or drainage. Identify which joint is open, what materials meet there, how movement occurs, and whether the underlying detail can drain. Applying sealant over wet, dirty, deteriorated, or incorrectly assembled materials may hide the clue without correcting the path.
Plan stucco and siding removal limits
Access to wood or flashing may require disturbing stucco, lath, weather-resistive layers, siding, trim, or paint. Define the initial cut limits and how edges will be protected. Existing assemblies vary, and a clean surface patch may still reveal concealed deterioration that changes the scope. Patch-back requirements should follow documented exposure rather than a generic allowance that assumes uniform conditions.
Review window and door responsibilities
Water near an opening may relate to the opening, surrounding wall, roof edge, flashing, sealant, or another source. State whether the scope includes only adjacent construction, the window or door unit, glazing, interior finishes, or specialist testing. This prevents an exterior trim repair from being represented as a complete window-system correction when the evidence does not support that conclusion.
Coordinate wood repair with water control
Once the approved area is open, repair the included wood and connections only after the water-control plan is clear. Flashing, membranes, sealant joints, drainage gaps, roof-edge components, or gutter work may need to precede finish restoration. A coordinated sequence reduces the chance that new stucco or trim blocks access to a detail that still requires correction.
Set realistic finish expectations
Stucco texture, aged paint, siding profiles, and weathered trim may not match perfectly. Define patch dimensions, texture intent, primer and paint limits, and whether full-plane coating is included. The owner should understand visual boundaries before work begins. Hidden damage, code issues, discontinued materials, or owner changes remain written change-order conditions.
Confirm access from both sides
An exterior transition may border an occupied room, attic, soffit, or concealed cavity. Identify which side provides useful access and what protection each choice requires. Interior access may reduce exterior demolition for observation but still leave flashing concealed; exterior opening may expose water-control layers while disturbing larger finishes. The scope should explain why the selected side answers the repair question and what remains unverified.
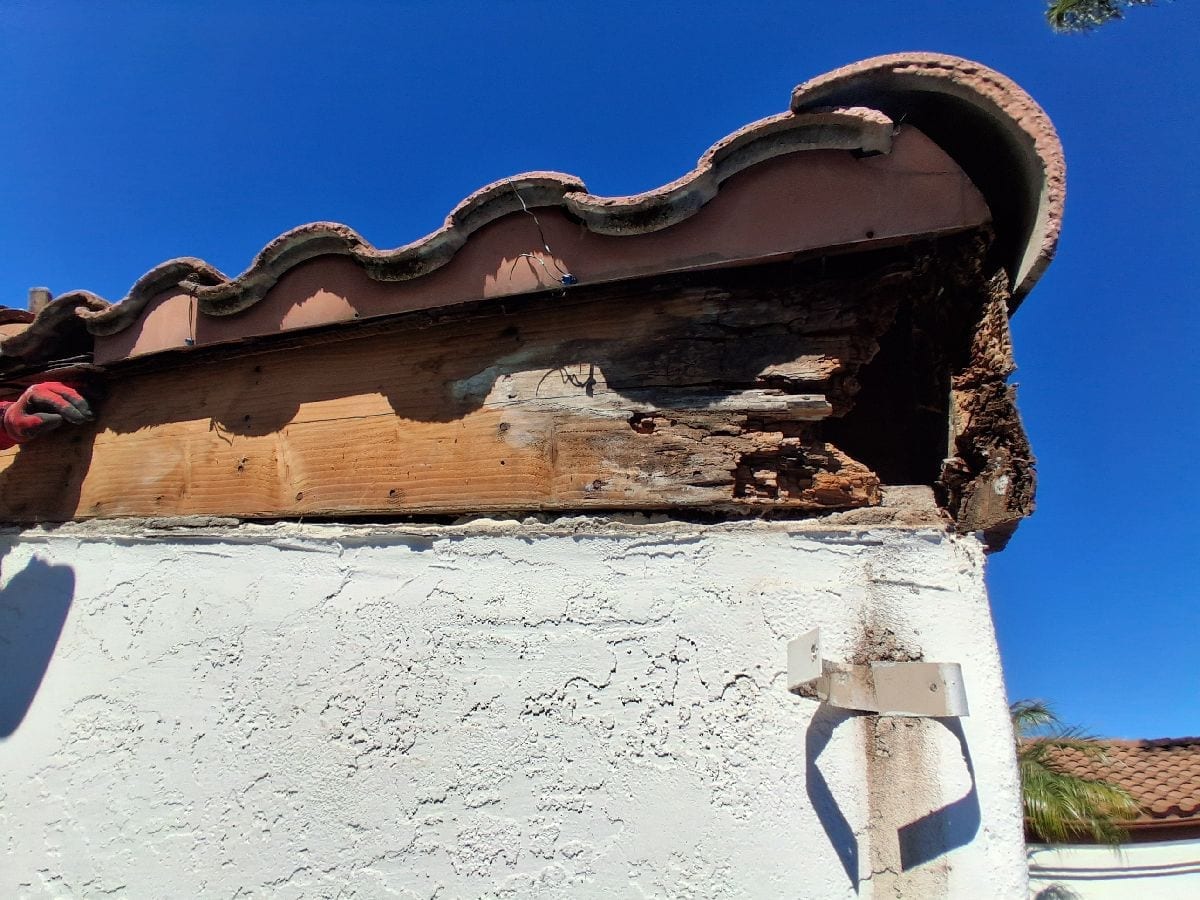
At material transitions, define the drainage function and removal limits before choosing the finish repair.
Continue planning
Fascia, Soffit and Rafter-Tail Repair Planning
Understand source review, opening limits, wood repair, gutter coordination, and finish restoration around damaged San Diego roof edges.
Read the guidePreventing Repeat Moisture Damage After Wood Repair
Build maintenance and observation around the actual water path after a dry-rot repair, without unsupported promises.
Read the guide